Good Quality for Double side shelving to Irish Manufacturers
Short Description:
Suzhou Innovative Store Equipment Co., Ltd – Manufacturing of shelf systems for shop fittings ( shop shelving, retail shelving, display shelving, storage shelving, warehouse shelving ) was started in the 1989’s. Because of improvement in products quality and achievement of compatibility with another used shelf systems, production strongly expanded both in total output and quantity of manufactured components parts. We are willing to offer you a solution for any problem in the area of shopfitti...
Good Quality for Double side shelving to Irish Manufacturers Detail:
Suzhou Innovative Store Equipment Co., Ltd – Manufacturing of shelf systems for shop fittings ( shop shelving, retail shelving, display shelving, storage shelving, warehouse shelving ) was started in the 1989’s. Because of improvement in products quality and achievement of compatibility with another used shelf systems, production strongly expanded both in total output and quantity of manufactured components parts.
We are willing to offer you a solution for any problem in the area of shopfitting. We can offer both our standard products and products meeting your specific requirements.
Everything will be delivered in perfect shape and high quality.
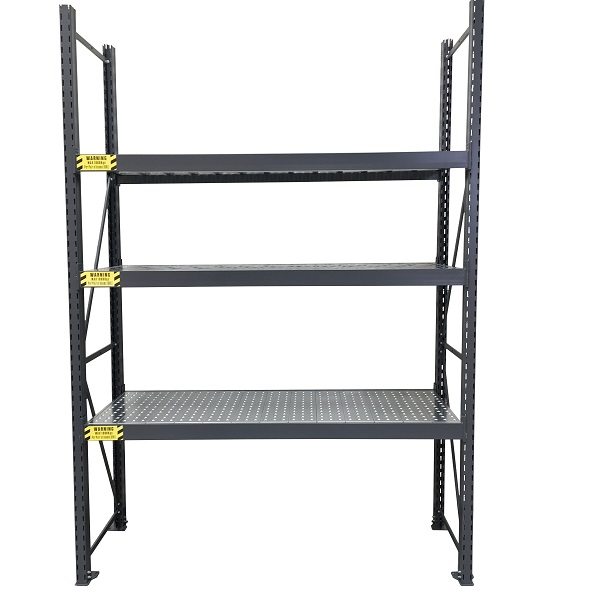
Standard components
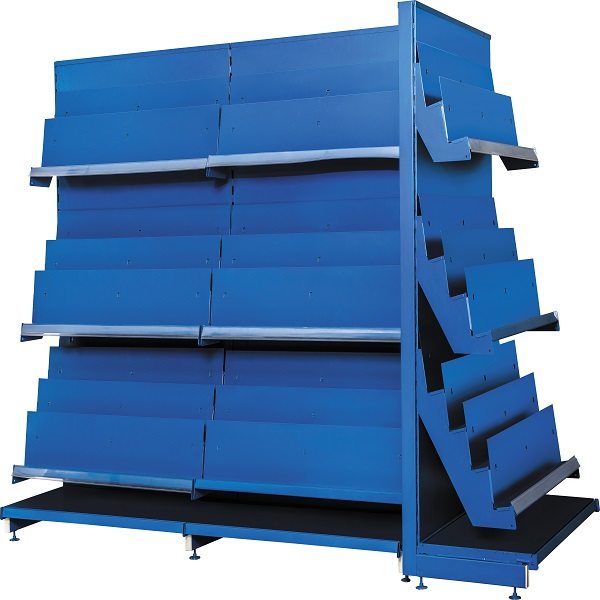
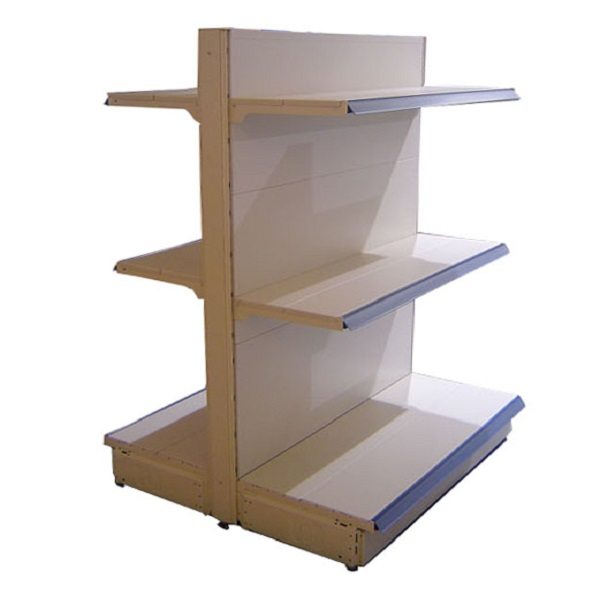
- Double sided gondola provide maximum merchandising capacity for your store
- Heavy duty slotted uprights and base supports make shelving unit stable
- Base shelf made of rugged 0.8mm steel
- Attractive powder coating finish
- Back panel made of 1.2mm steel panel with standard 1” centered holes
- Back panel made of 0.9mm steel panel with slot channel
- Back panel made of 0.7mm steel flat panel
- Back panel made of 6mm MDF with standard 1” center holes
| Upright | H 1210 – 3010mm |
| Base support | 200mm | 270mm | 300mm | 370mm | 470mm | 570mm | 670mm | 770mm |
| Steel shelf | W 665mm | 800mm | 1000mm | 1200mm | 1220mm | 1250mm | 1330mmD 200mm | 270mm | 300mm | 370mm | 470mm | 570mm | 670mm | 770mm |
| Back panel | W 665mm | 800mm | 1000mm | 1200mm | 1220mm | 1250mm | 1330mmH 100mm | 200mm | 300mm | 400mm | 500mm |
| Colors | Ral 9001 | Ral 9010 | Ral 7035 | Ral 9006 |
| Load Capa. (kgs) | 100kgs – - - 150kgs |
Advantage
- Easy set up with no tools required
- Designed to conserve warehouse space
- Industry’s most competitively priced units
- Designed to get attention and give maximum display space
More option
Use our optional parts and accessories to create a unique point-of-purchase units.
Peg hooks | Wire slatwall shelves | Light box | Timber shelves | Side frame | Side mirror panel | Wire cage | Spreader bar
What we can offer:
- System solution for any kind of shop centers
- High flexibility
- Simplicity and favourable price
- High quality
- Development and design according to requirements of clients
Product detail pictures:
Related Product Guide:
Why Choose Us for CU Racking
Bibliophile Guide to Procure Perfect Bookshelves
Good Quality for Double side shelving to Irish Manufacturers, The product will supply to all over the world, such as: , , ,