High Definition For Grid back shelving Wholesale to Nicaragua
Short Description:
Suzhou Innovative Store Equipment Co., Ltd – Manufacturing of shelf systems for shop fittings ( shop shelving, retail shelving, display shelving, storage shelving, warehouse shelving ) was started in the 1989’s. Because of improvement in products quality and achievement of compatibility with another used shelf systems, production strongly expanded both in total output and quantity of manufactured components parts. We are willing to offer you a solution for any problem in the area of shopfitti...
High Definition For Grid back shelving Wholesale to Nicaragua Detail:
Suzhou Innovative Store Equipment Co., Ltd – Manufacturing of shelf systems for shop fittings ( shop shelving, retail shelving, display shelving, storage shelving, warehouse shelving ) was started in the 1989’s. Because of improvement in products quality and achievement of compatibility with another used shelf systems, production strongly expanded both in total output and quantity of manufactured components parts.
We are willing to offer you a solution for any problem in the area of shopfitting. We can offer both our standard products and products meeting your specific requirements.
Everything will be delivered in perfect shape and high quality.
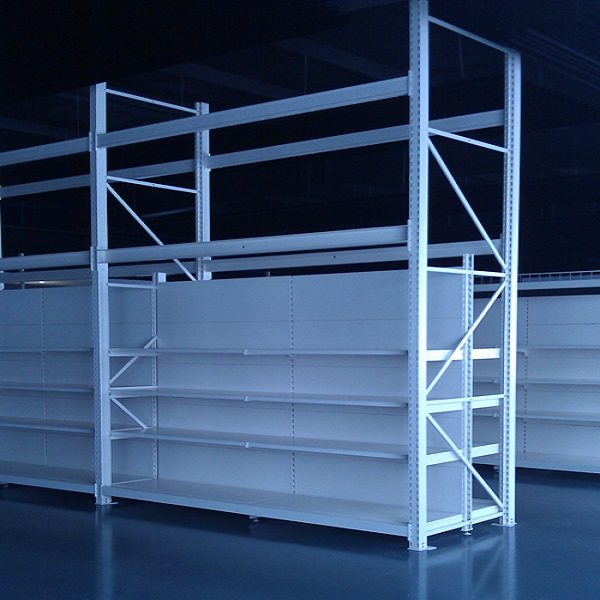
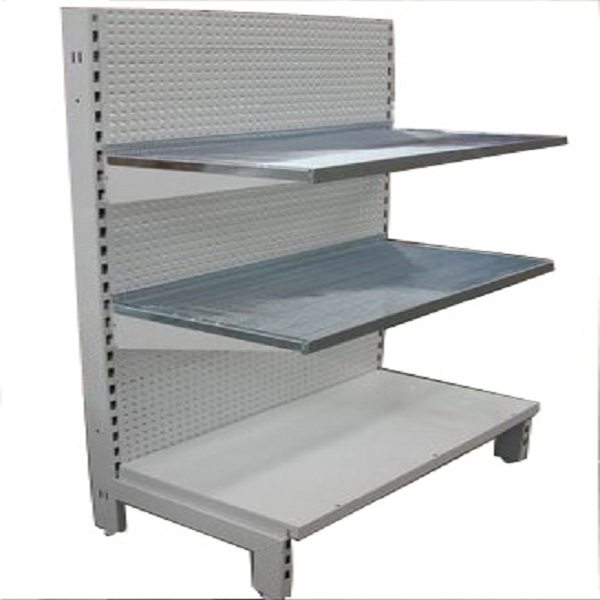
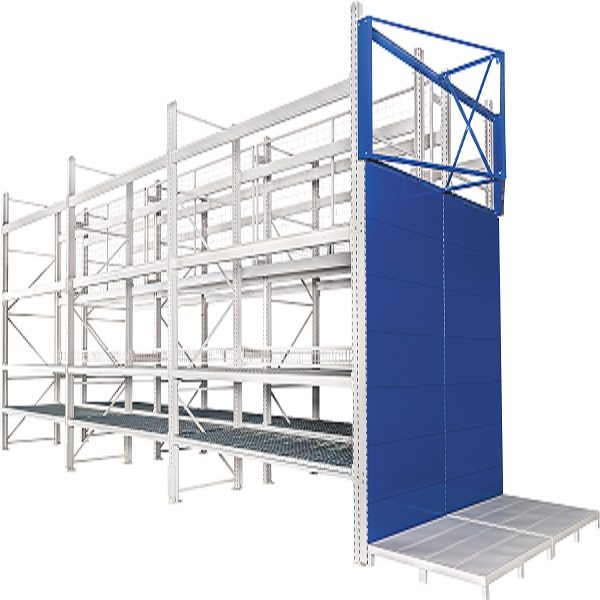
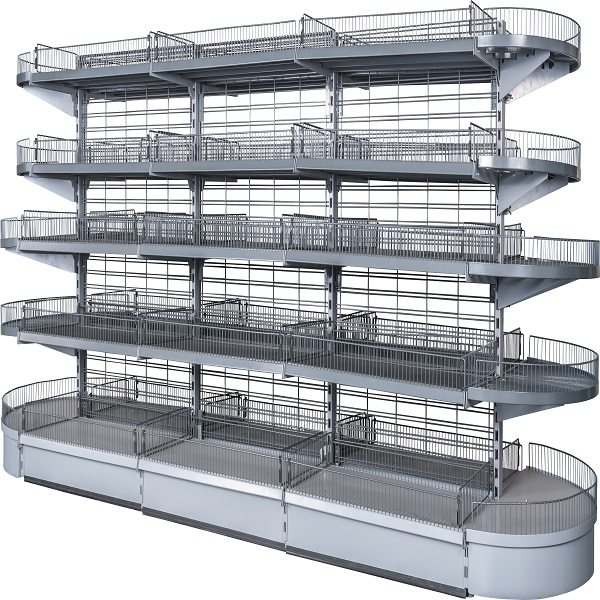
Standard components
- The wire grid shelving has virtually endless possibilities, Use it as an promotion merchandiser shelving for special sale items
- Heavy duty slotted round uprights and base support made in rugged steel
- Base shelf made of rugged 0.8mm steel
- Attractive powder coating finish
- Wire grid back panel made of steel wire with 25*50mm grid
- End unit with round shelves to make the better viewpoint
| Upright | H 1210 – 3010mm |
| Base support | 470mm |
| Steel shelf | W 665mm | 800mm | 1000mm | 1250mm | 1330mmD 470mm |
| Back panel | W 665mm | W 800mm | 1000mm | 1250mm | 1330mmH 400mm |
| Colors | Ral 9001 | Ral 9010 | Ral 7035 | Ral 9006 |
| Load Capa. (kgs) | 100kgs – - - 150kgs |
Advantage
- Easy set up with no tools required
- Designed to conserve warehouse space
- Industry’s most competitively priced units
- Designed to get attention and give maximum display space
More option
Use our optional parts and accessories to create a unique point-of-purchase units.
Peg hooks | Wire slatwall shelves | Light box | Timber shelves | Side frame | Side mirror panel | Wire cage | Spreader bar
What we can offer:
- System solution for any kind of shop centers
- High flexibility
- Simplicity and favourable price
- High quality
- Development and design according to requirements of clients
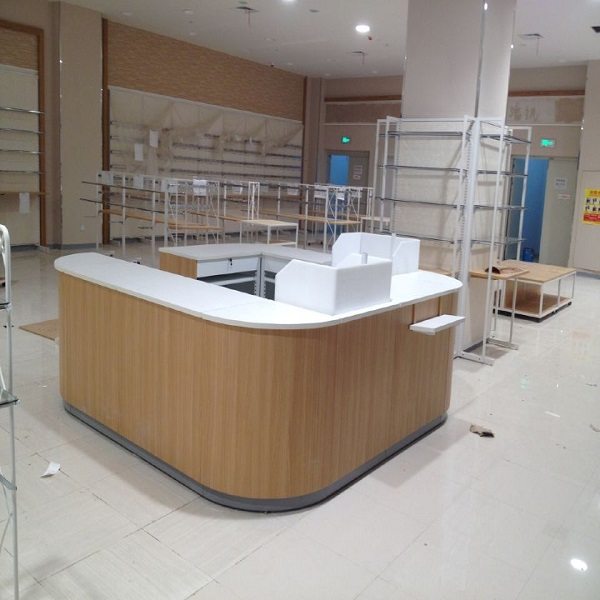
Product detail pictures:
Related Product Guide:
Why Choose Us for CU Racking
Bibliophile Guide to Procure Perfect Bookshelves
High Definition For Grid back shelving Wholesale to Nicaragua, The product will supply to all over the world, such as: , , ,
With the wide array of products constantly entering your pet supply store, merchandising a retail pet store can be a real challenge. Finding reliable, versatile display fixtures to highlight those products in your store is essential. By working with pet supply retailers of every size and in every market across the country, Midwest Retail Services has earned the real world experience required to be a partner in the success of your store.
Rely on our industry specialists to match your store with the right combination of gondola shelving, display fixtures, and merchandising accessories in order to become your one-stop shop for all your retail fixture needs.
Let Midwest Retail Services provide you with dynamic, organized display shelving that grabs customers’ attention and boosts your store sales.
Versatility is paramount when it comes to pet stores; with widespan racking for heavy or bulky items like pet food, dog crates, and aquariums — to attention-grabbing floor stack merchandisers and point-of-purchase displays to maximize your sales potential.
Our pet store experts will outfit your store with peg hooks, scan hooks, and crossbars to ensure you are utilizing every inch of retail opportunity. Including a wide selection of shelving and accessories from major manufacturers like Lozier, Streater, and Madix.
Visit www.midwestretailservices.com to browse options and view our portfolio, or call 800-576-7577 to get the quick answers, advice, and ideas for the pet shop fixtures, shelving, and accessories you’ve been searching for.
Striplox Mini 120 Invisible Joiner
https://www.richelieu.com/QR/c/1198306
Striplox Mini 120 connectors enable a rapid assembly with a fully concealed joining and fastening solution to any piece of cabinetry, furniture, or design applications. The Striplox Mini 120 connectors produce a tight and strong joint either in a permanent or reversible configuration making them perfectly suited for commercial, domestic, and architectural furniture, kitchen — bathroom and wardrobe cabinetry, commercial fit-outs plus many more applications.
Integrating the Mini 120 connectors into your processes is easy. The installation incorporates existing manufacturing methods and delivers a fast assembly of components, panels or sections — either in the factory, in the home or in the most remote site locations.
Striplox Mini 120′s are suitable for numerous applications with the evenly distributed loading offering strength, durability and versatility. It offers the ultimate in fine line finishes — visually providing a concealed flush finish with no signs of fasteners or connectors being used like staples, screws, cam & dowels or cover caps.
The key advantage of the Striplox Mini 120 connectors is to deliver unmatched cost savings. Striplox Mini 120 connectors can be fitted in the factory ready to assemble by hand anywhere in the world at a fraction of usual assembly and installation costs. The unique design of the Striplox connectors offer many benefits and advantages on transportation savings, with the ability to flat pack with knock down components. Saving on assembly cost at installation, the components or cabinetry will firmly lock together without the need of tools, screws or fasteners saving time and labour.
You will also save on production costs and machining costs versus other substrate joiners with less positioning rebates and less components. Due to the unique load-spreading design, you will dramatically reduce the chance of substrate blow out commonly caused by over tightening conventional screws and fasteners.
ADVANTAGES AND BENEFITS
- No visible fixings — completely concealed joint
- Eliminates damage — install panels during final build
- Lower transportation cost — flat pack
- Lower labour costs with fast on site assembly
- Strength, Durability and Versatility
- Cabinetry or panels can be fitted permanently or removed with ease
- Joining will not interfere with substrate finish ie. Veneers, 2pac paint
- Can be used in substrates of 12mm thickness and upwards
APPLICATION
-Feature ceilings, walls, cabinetry, shelving
-Kitchen and cabinet hardware
-Commercial wall paneling and office partitioning
-Kitchen design
-Custom cabinets
-Modular entertainment builds
-Kitchen cabinet ideas
-Cabinet makers
-Locker systems assemblies
-Wood & timber joints
-Toilet/shower partitioning
-Wardrobe fit outs
-Framing of artwork/mirrors
-Furniture construction and interior fitting
-Shop fitting displays and signage
-Exhibition and trade events
-DIY garden shed and Patio
-RV and Marine fit outs
https://www.richelieu.com